
Step-by-step instructions for making a patchwork quilt for babies
Below is a complete step-by-step guide to making a cute, soft, and safe quilt for your baby, with colorful blocks, appliqués, and a quilted finish.
1. Planning and materials
• Final size: choose a suitable size for a crib or baby bed, for example:
Standard crib: 100 x 140 cm
Mini quilt for stroller: 60 x 90 cm
• Fabrics:
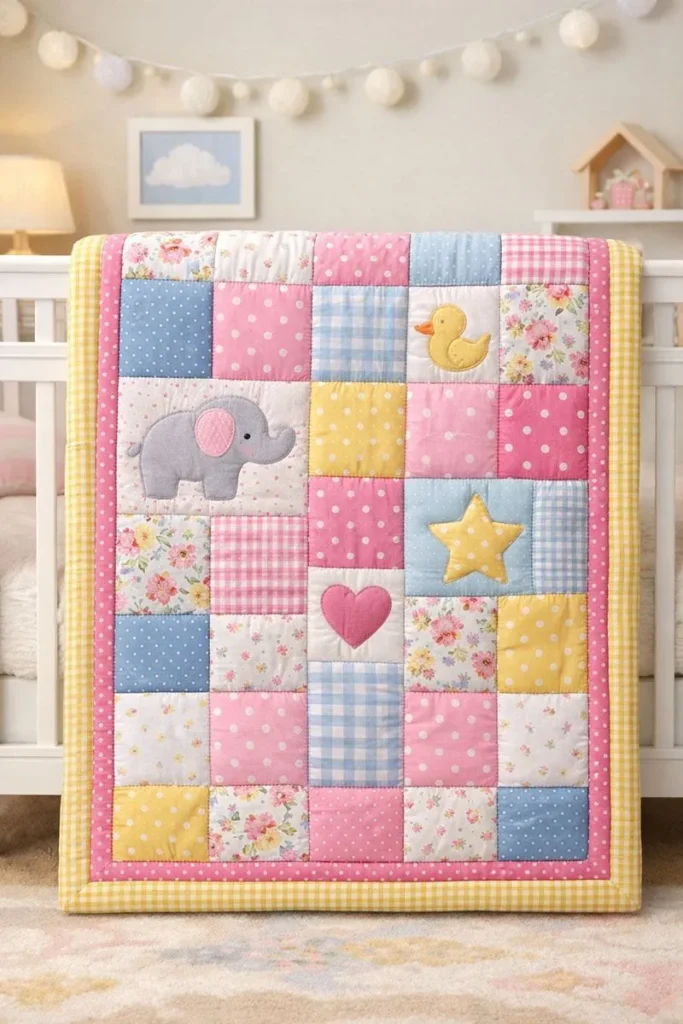
Base fabric: soft cotton, preferably 100% cotton, in neutral colors.
Scraps: many small scraps (5 x 5 cm or 6 x 6 cm) in pastel shades (pink, blue, yellow, green) with soft prints (polka dot, plaid, floral).
Appliqués/figures: elephant, sunflowers, stars, hearts, or animals for a baby theme.
Backing: soft fabric for the back.
• Filling (batting): 100% polyester or cotton fiber, of good quality.
• Edges:
Fabric for the sleeve/outer edge (binding) in a complementary color.
• Tools:
Sewing machine, suitable thread (preferably 100% cotton), scissors, rotary cutter, ruler, pins, tailor’s chalk, hot iron, ironing board.
Quilting needle or hand needle.
Measuring tape.
2. Block Design and Planning
• Layout: Use a series of square blocks (for example, 8 x 8 blocks for a 100 x 140 cm quilt, each block 12.5 cm with 1.5 cm spacing between them).
• Each block can have a simple theme:
Blocks with patchwork scraps.
Blocks with custom appliqués (elephant, clouds, stars).
• Define a soft and harmonious color palette for the baby.
3. Cutting the Pieces
• Cut two pieces of the main fabric to the final size (front and back).
• Cut all the scraps (5 x 5 cm or 6 x 6 cm) according to the size of each block.
• Cut the lining, also to the final size, with a 2.5 cm seam allowance on each side.
• Cut the facings to the final size, making them smaller (2.5 cm less on each side) to facilitate quilting.
4. Assembling the Blocks
• Assemble each block by combining different patterns to form various designs (checkered, floral, polka dot).
• If you want to apply a simple figure (like an elephant) to some blocks: use felt fabric or apply fabric, attaching it with small stitches on the wrong side.
• Join the blocks with straight stitching, maintaining 0.5 cm to 1 cm seam allowances between each block, forming a grid border.
5. Assembling the Quilt Front
• Arrange the blocks in a pre-defined layout (symmetrical order or as desired).
• Join the horizontal lines, then the vertical lines, being careful to maintain alignment.
6. Preparing the Padding and Backing
• Place the right backing down, the batting in the center, with the quilt front on top.
• Pin everything in place or use quilting spray.
• Do simple quilting around each block or in straight lines following the seams to hold everything in place.
7. Quilting (Finishing Stitch)
• Simple quilting: straight line along the block seams, 2-3 cm between lines.
• If you prefer, use a soft quilting pattern, such as smooth curved paths around the appliquéd figures.
• Do not overdo the quilting so as not to strain the baby’s fabric.
8. Finishing the Edges
• Hem or bind the edges of the quilt 2.5 to 3 cm wide.
• If you prefer a wider border, use 4 cm binding for a more handcrafted look.
• Add a bow or label with the baby’s name, if desired.
9. Finishing
• Wash the quilt to remove manufacturing residue.
• Iron on a warm setting, keeping the steam low to avoid damaging the fabric.
• Check for loose stitches and re-iron as needed.
Quick tips for a cute effect
• Combine soft prints such as small flowers, thin stripes, and polka dots in pastel shades.
• Include simple animal or heart appliqués in some blocks to add personality.
• Use lightweight comforter to prevent the quilt from weighing down the crib.