
How to Make a Colorful Patchwork Chicken
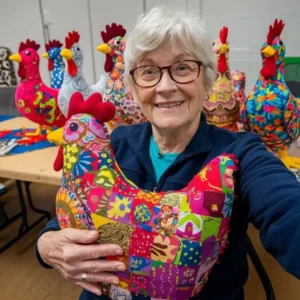
Patchwork chickens are charming decorative pieces, perfect for kitchens, gourmet areas, or even as a handmade gift. The model in the image features a structured body in the traditional chicken shape, composed of colorful squares, with firm stuffing and well-defined details.
Materials Needed
• Scraps of various fabrics (floral and colorful prints)
• Red fabric (comb and wattle)
• Yellow fabric (beak)
• Lining fabric (raw cotton or similar)
• Acrylic batting or silicone fiber (stuffing)
• Sewing thread (neutral color)
• Scissors
• Pins
• Sewing machine (or hand sewing)
• Chicken pattern (body, side, base, comb, wattle, and beak)
• Button or black felt (for the eye)
1. Preparing the Patchwork Body
Assemble the square panel
– Cut squares approximately 5×5 cm (or the desired size).
– Choose varied prints to create a cheerful look.
– Arrange the squares to form a larger panel that covers the body pattern.
– Sew the squares together into strips.
– Join the strips to form a single panel.
– Iron to set the seams.
📌 Tip: Alternate strong colors with floral prints to add more emphasis.
2. Cutting the Body
– Position the body pattern on the patchwork panel.
– Cut two mirrored body pieces.
– Cut a side strip (which will give depth to the piece) about 8 to 10 cm wide, long enough to go around the entire body.
– Cut an oval base for the bottom.
3. Making the Crest, Wadding, and Beak
• Crest: cut two pieces from the red fabric.
• Wadding: cut two smaller pieces from the same fabric.
• Beak: cut two triangular pieces from the yellow fabric.
Sew each piece right sides together, turn right side out, and add some stuffing.
4. Assembling the Chicken
Step 1 – Applying the details
– Position the beak between the two body parts (on the front).
– Place the wattle just below the beak.
– Position the comb on top of the head.
– Pin everything together.
Step 2 – Sewing the body
– Sew the two body parts together, leaving the bottom open.
– Attach the side strip around the body.
– Sew the oval base, leaving a small opening for stuffing.
5. Stuffing and Finishing
– Turn the piece right side out.
– Fill with silicone fiber until firm.
– Close the opening with invisible hand stitches.
– Sew or glue the eye (black button or felt).
– Make small adjustments to the stuffing to give it a rounded shape.
Final Touches
• You can add:
– A bow around the neck
– Lace trim at the base
– Embroidered appliqués
– Padded side wings
Suggested Measurements
• Height: 25 to 35 cm
• Width: proportional to the chosen pattern
• Base: firm oval for support
Important Tips:
✔ Use 100% cotton fabrics for a better finish.
✔ Always iron after each step.
✔ If you want it to be decorative and heavier, add sand inside a plastic bag to the base before stuffing.
✔ Sew slowly along the curves to avoid puckering.
Where to Use Your Patchwork Chicken:
• Kitchen decoration
• Easter table decoration
• Handmade gift
• Doorstop (with a heavier base)