Step-by-Step Guide to Creating a Hexagonal Patchwork Pattern
Hexagon Shapes: Patchwork Art
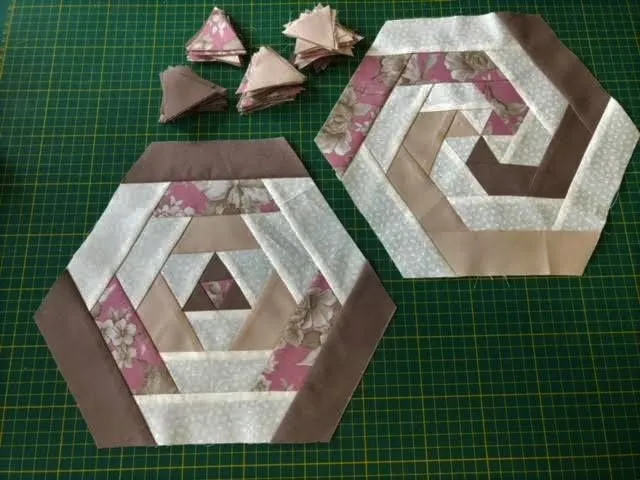
This guide will help you create a patchwork pattern using hexagon and triangle assembling techniques, with decorative details in the center. Let’s go!
Materials needed:
• Fabric in different shades and prints (combine colors and prints to your liking)
• Scissors or rotary cutter
• Ruler or acrylic tape
• Pins
• Needle and thread or sewing machine
• Frame for assembly or flat surface for gluing
• Carbon paper or markers to mark the cuts (optional)
• A small decorative flower (or fabric cutout) for the center
Step 1: Planning the Design
Before you begin, visualize the composition:
• Large main hexagon that will be the center of the patchwork
• Triangles that form the inner edges of the hexagon
• Decorative details in the center (such as the flower)
Step 2: Cutting the Fabric
Cut the following blocks of fabric:
Hexagon:
• Cut a large hexagon (measurement of your preference, for example, 15cm high)
Triangles
• Cut equilateral triangles that will fill the inner edges of the hexagon
• To To do this, cut squares (for example, 7 cm on each side) and, using the ruler, mark and cut along the two diagonals to form triangles.
Additional details:
• To create the internal details, cut small triangles or rectangles in proportional sizes.
Central flower:
• Cut a small flower from decorative fabric or felt.
Step 3: Assembling the hexagon.
1. Position the triangles around the larger hexagon, aligning them at the edges to form a more detailed hexagonal figure.
2. Use pins to temporarily hold the pieces in place.
Step 4: Sewing.
1. Sew each triangle to the larger hexagon, joining the edges with precise and even stitches.
2. For easier assembly, sew by machine or by hand, making sure the seams are even to avoid excess fabric or puckering.
Step 5: Internal details
• Insert the small triangle or other decorative detail into the center of the hexagon, creating a layered effect.
• Glue or sew the central flower in the desired position, as the focal point of the patchwork.
Step 6: Finishing
• Iron over the seams to set and give a clean finish.
• Check that all the pieces are well sewn, cutting off excess or adjusting imperfections.
Final tips
• Play with prints and colors to create a unique pattern
• You can use different sizes of hexagons and triangles for different effects
• Add finishing with ribbon or embroidery around the edges
With these steps, you can create a beautiful patchwork pattern, perfect for quilts, pictures, pillows or decorative tapestries. Enjoy the process and let your creativity run wild!