
How to Make a Patchwork Apron
A patchwork apron is the perfect project for anyone wanting to use up fabric scraps and create a beautiful, useful piece full of personality. Beyond protecting your clothes while cooking, gardening, or crafting, it allows you to creatively combine prints and colors.
In this tutorial, you will learn a simple, detailed method for making a patchwork apron, even if you are just starting out in sewing.
Materials Needed
Fabrics
• Assorted cotton patchwork scraps
• Lining fabric (optional)
• Fabric for bias tape or edging
• Fabric for pockets (optional)
Tools
• Sewing machine
• High-quality thread
• Scissors
• Rotary cutter (optional)
• Patchwork ruler
• Cutting mat
• Iron
• Pins or clips
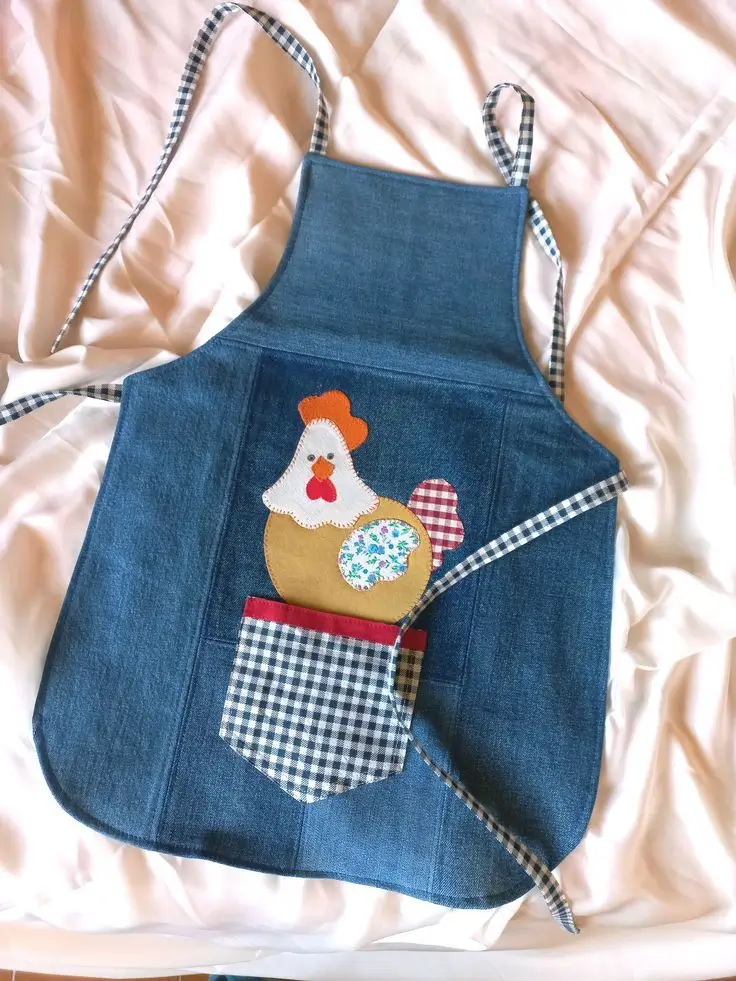
Apron Measurements
A comfortable size for adults is:
• Body height: 70 cm
• Top width: 26 cm
• Bottom width: 65 cm
These measurements can be adjusted to your preference.
Choosing the Scraps
The beauty of patchwork lies in the combination of prints.
Mix:
• Florals
• Polka dots
• Checks/Gingham
• Stripes
• Solid colors
• Delicate prints
Choose a color palette to ensure the piece looks harmonious.
Examples:
• Country tones
• Blue and white
• Red and beige
• Pastel tones
• Vintage style
Step 1 – Cutting the Squares
To make the work easier, cut all the scraps to the same size.
A good size for beginners is:
• 10 cm x 10 cm
You will need approximately 35 to 45 squares, depending on the size of the apron. Press all the fabrics before starting.
Step 2 – Plan the Design
Arrange the squares on a table or the floor.
Alternate between:
• light prints
• dark prints
• solid fabrics
• florals
Swap positions until you find a pleasing composition.
Take a photo before sewing to keep track of the layout.
Step 3 – Sew the Rows
Join two squares with right sides facing each other.
Sew using a 0.75 cm seam allowance.
Continue adding squares until the first row is complete.
Repeat the process until all rows are assembled.
Step 4 – Press the Seams
After each row is finished:
• open the seams with the iron;
• press carefully to avoid bulk.
This step makes a big difference in the final finish.
Step 5 – Join the Rows
Now sew the rows together.
Align the corners where the squares meet.
Pin in place.
Sew slowly to keep everything aligned.
Press again with the iron.
You now have a large patchwork panel.
Step 6 – Make the Apron Pattern
Draw the apron shape directly onto the panel.
The traditional style features:
• a narrower top section;
• slightly angled sides;
• a straight bottom edge.
Cut out following the pattern.
Step 7 – Prepare the Lining (Optional)
If you want a sturdier apron:
• place the pattern on a single piece of fabric;
• cut the lining to the same size.
Place right sides together.
Sew, leaving an opening.
Turn right side out.
Press with the iron.
Step 8 – Make the Pockets
Pockets make the apron even more functional.
Cut:
• two 18 × 20 cm rectangles.
Fold the top edge twice.
Sew. Fold the remaining edges inward.
Position the pockets.
Pin them in place.
Sew along the three sides.
You can divide a large pocket into two smaller ones by sewing a vertical line down the center.
Step 9 – Attach the Bias Binding
Bias binding provides a beautiful, reinforced finish.
Start at the top.
Then, sew around the entire apron.
If you prefer, use pre-made bias tape.
Step 10 – Make the Straps
Neck strap
Cut one strip:
• 8 cm × 60 cm
Fold in half.
Sew.
Turn right side out.
Press with an iron.
Attach to the top section.
Waist ties
Cut two strips:
• 8 cm × 75 cm
Sew in the same way.
Attach to the sides of the apron.
Step 11 – Press the Entire Piece
Carefully press the whole apron.
This flattens the patchwork and enhances the finish.
Personalizing the Apron
Once finished, you can add:
• flower appliqués;
• hearts;
• country-style hens;
• cats;
• cows;
• butterflies;
• hand embroidery;
• decorative buttons;
• lace;
• ric-rac trim;
• personalized labels.
Every detail makes the piece unique.
Tips for Beginners
• Start with cotton fabrics, as they are easier to sew.
• Sew slowly to keep the blocks aligned.
• Press with an iron after each step for a neater finish.
• Use thread that matches the dominant color or a neutral shade.
• Make use of small scraps: even tiny pieces can create a beautiful mosaic.
Final Result
Upon completing this project, you will have a unique apron made from fabric scraps that might otherwise have been discarded—transformed into a charming piece. Beyond being a great exercise for those learning patchwork, it is also an excellent option for gift-giving, selling at craft fairs, or adding a cozy, handcrafted touch to your kitchen décor.